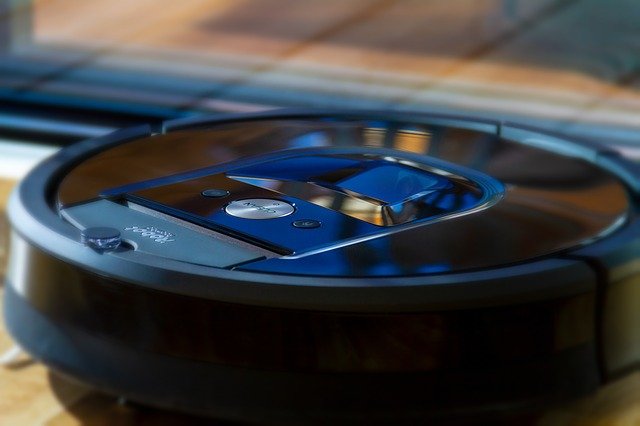
When you wanted to clean up, your iRobot robot vacuum decided otherwise. Indeed, he decided not to light up. Although the brand is the most famous and one of the most reputable in the manufacture of robot vacuum cleaners, its products can unfortunately also encounter malfunctions. Several factors can be the cause of this problem: software bug, faulty charging accessory, faulty battery or internal component out of order. Fortunately, some causes can easily be resolved on your own. So, without further ado, discover What to do when your Roomba vacuum won't start?
How do I fix a Roomba vacuum that won't start?
First and foremost, when your Roomba vacuum cleaner is not working, check that you have programmed it correctly, that the date and time are correct and that there are no error messages. If one of these elements is not respected, please consult the user manual of your iRobot vacuum cleaner model to correct it. If you receive an error message that you cannot resolve, contact the iRobot after-sales service. Also make sure that your vacuum cleaner has been properly charged before using it. Allow a full day for the device to be fully charged.
If all of these prerequisites are met, you will now need to move on to checks and manipulations more in-depth. Then perform the steps below in order. You will start from the easiest manipulation, to the most difficult.
Please note: risk of electric shock and damage to the device. Unplug Roomba from its power source when performing maintenance or disassembling the unit. If you are not able to carry out a manipulation, call the iRobot after-sales service or a professional.
Reset Roomba vacuum
First of all, when your Roomba robot vacuum does not start even though its light is green and that the programming has been done, it may be that a software bug be the source of the problem. In this case, a simple vacuum cleaner reset sometimes solves the problem.
To reset the Roomba vacuum, proceed as follows:
- Remove your Roomba robot vacuum from its base station
- Press the start button for Roomba to turn on
- Simultaneously press the SPOT+DOCK buttons for about ten seconds, until the Power button goes out and a melody sounds. If the spot and dock buttons do not exist on your model, press the "CLEAN" button for 10 seconds.
- Then charge the vacuum cleaner with the charging cable (and not the station) for at least 16 hours.
Please note: Charging must not be interrupted for the vacuum cleaner to complete its reset. Following the Reset, you will need to program your robot's tasks, language, date and time again.
Note: If you cannot find the SPOT+ DOCK or CLEAN buttons, refer to the user manual for your Roomba vacuum model. Indeed, the reset procedure may be different depending on the model of your vacuum cleaner.
Emptying and cleaning the Roomba robot vacuum
Secondly, your Roomba robot vacuum does not start because maintenance operations have not been carried out. It may then be clogged or dirty. Here are some checks to perform:
- Empty the tank. Note that it is advisable to empty it after each use and before it reaches 3/4 of its maximum capacity.
- Check that nothing is blocking the cells Roomba vacuum that no longer turns on. If you notice that the robot is dirty or dusty, clean it. Be sure to follow the cleaning instructions for your model.
- Check the condition of the filter. If it looks clogged, it will have to be cleaned. Note that it is advisable to clean it very regularly. Please note: they are not designed to be washed. You just have to dust them off. If the filter appears damaged or too dirty, you will need to replace it. Note that it is recommended to change the filter once a year.
Check the power supply of the Roomba vacuum cleaner that no longer turns on
Your Roomba robot vacuum may no longer work because it has not received the power needed to do so. You will then have to check if the problem is with the power source and therefore from the electrical outlet, the base station, the charger or the battery.
1 – Check the electrical outlet
Start by check if the electrical outlet is working. This all the more if the charging light on your Roomba vacuum does not come on when you plug in the robot. Then try to charge it on another electrical outlet. If you are using a power strip or extension cord, remove it. Plug the vacuum directly into an electrical outlet.
Note: Make sure you have sufficiently charged the device before trying to start it. That is to say, let it charge at least 16 hours.
2 – Check the Roomba robot vacuum base station
When your Roomba vacuum is not working, it is also possible that the problem comes from the charging accessory, and therefore from the Home Base station. It may be totally defective or no longer provide the current required for charging. Thus, note that in this case the charging light may be on while the battery of theroomba vacuum not charging.
First, to check if the Roomba vacuum's charging station is responsible for its failure, try to charge your Roomba vacuum that won't start using the charger and not via the base station. Put it on long charge (a whole day). If the robot vacuum cleaner charges and works normally with the charger, the fault is indeed in the base station. If the vacuum does not charge or turn on after using the charger, the problem most likely lies with a faulty component inside the device.
To make sure that the fault really comes from the Home Base station, do the following:
• Visually check whether the terminals of the charging station appear damaged. More specifically, look to see if they seem bent, oxidized or dirty as this could be a sign of a loose contact. If you notice that they appear dirty or oxidized, clean them with a dry cloth or compressed air suitable for electrical appliances. Caution, carry out this operation with the power off.
• Check the voltage at the terminals of the base station. To do this, plug the base into an electrical outlet. Set the multimeter to the direct current voltmeter position. Put the test probes on the terminals. If the multimeter shows zero voltage or less than indicated, then the base station is faulty. In this case, it will need to be replaced so that your Roomba robot vacuum works normally again.
3 – Check the battery of the vacuum cleaner
Finally, it may be that your iRobot robot vacuum cleaner no longer starts due to a battery problem. Indeed, the battery is the power supply of your robot. If a bad contact is present at the level of the battery, that it no longer charges or that it is faulty, your vacuum cleaner will not turn on. Also note that if your Roomba vacuum does not no longer holds the charge, the charging light comes on but charging never stops, or it stops and beeps, this is a sign that the battery is not working properly.
Note: If your Roomba is still entitled to the warranty (2 years manufacturer in France), contact the service iRobot after-sales for a free repair or replacement of your device. Do not disassemble your device as this voids the warranty.
First of all, try resetting the devicet its battery by proceeding as follows:
- Turn off the iRobot robot vacuum
- Turn the device over and remove the two screws from the cover that provide access to the battery
- Remove the battery and check that nothing is blocking the battery contacts. If so, clean them with a dry cloth or a special compressed air spray for electronic components.
- Then press the CLEAN button for 10 seconds
- Put the battery back in its place, then reattach the cover and the screws
- Charge the vacuum for at least 16 hours
If no charging light comes on or the manipulation did not work and your Roomba robot still does not turn on, the battery may be defective. Then electrically test the battery by proceeding as follows:
- Charge the battery to the maximum with the charger or the charging cradle (if you feel that it is no longer charging, let it charge anyway for the time necessary for a full charge)
- Once the battery is fully charged, disconnect it electrically
- Without waiting, remove the screws that provide access to the battery, remove it from the vacuum cleaner and measure its voltage at its terminals using a multimeter in the direct current voltmeter position
1 – If you only notice the voltage is zero or less than indicated, the battery is faulty. It will then have to be replaced by an original battery.
2 – If the voltage is good, put the battery back in the vacuum cleaner, start it and then time its autonomy. If you notice that it discharges faster than the normal autonomy, it is defective. You will then have to replace it to have optimal operation of the device again.
What to do if despite everything your Roomba vacuum cleaner does not work?
If at this stage your Roomba robot vacuum cleaner does not start, unfortunately the problem becomes much more restrictive. Indeed, it will probably be a failure of an internal component. In this case, it will be necessary to disassemble the iRobot vacuum cleaner which no longer works, test the various components then replace the defective one. These manipulations require electrical clearances. If you do not have one, we strongly advise you to call a professional.
Please note: If your Roomba is still under warranty (2 years manufacturer in France), contact the service iRobot after-sales for a free repair or replacement of your device. Do not disassemble your device as this voids the warranty.
Testing the different components of the iRobot vacuum cleaner
To know which component is responsible for the failure of your Roomba robot vacuum, you will have to test them one by one. Here are the components most at risk of failure:
Again, if you have no electrical skills, contact a professional. Risk of electric shock and damage to the device. Always disconnect the battery before testing the various components.
The power button
The Power button, or also called a switch, allows you to mechanically switch on the vacuum cleaner's power supply. The sign that can alert that the switch is defective is that the iRobot vacuum cleaner does not turn on at all and that it has no signs of life (no noises and no lights on). To test the switch, do a continuity test using a multimeter. The latter must beep or display a value close to 0 in operation and no beep, 1 or OL when stopped. If the multimeter does not display anything or beep in the on position, the switch is most likely defective.
The power cord
If the Roomba vacuum cleaner does not turn on at all (no sound, no light), the problem may also be with the power cord that connects the battery and the electronic board. Indeed, if it is cut, damaged or detached from its terminal, it will not be able to transmit the current to the device which will then not start. It often happens that the cable has simply become disconnected due to a shock or repeated vibrations. You will then simply have to put the conductive wire back in its terminal and then tighten the screws. If it appears damaged or cut, it will need to be replaced.
Engine
If the Power light comes on but you don't hear any noise or a strange noise (jerks, muffled), it's a safe bet that the motor has failed. In this case, your robot vacuum turns on but does not start. You will then need to test the motor by measuring the voltage across its terminals using a multimeter set to an AC voltmeter. The measured voltage should be approximately 220V.
The electronic card
The electronic card is used to control and supply the various components of the vacuum cleaner. If it fails, then your Roomba vacuum cleaner will no longer be able to start. To check if your iRobot vacuum cleaner is no longer working because of the electronic board, you will need to measure its input supply voltage and its output supply voltage using a multimeter set to an AC voltmeter. If the two voltages are roughly similar (about 220V), then it is working fine. Otherwise, if the output voltage is lower or zero, it is faulty.
Contact iRobot Service or a repairer
If, despite all your efforts, your Roomba still does not start, you will need to contact an external service to successfully repair the fault. Likewise if you are unable to perform the above operations.
Whether your broken down Roomba robot is under warranty or not, you can first contact the iRobot after-sales service. They will then be able to find a solution adapted to your situation. Note that they are rather reactive and competent. If your device is no longer under warranty, you can also contact a professional repairer near you. In any case, don't forget to ask for a quote to avoid any disappointment.